
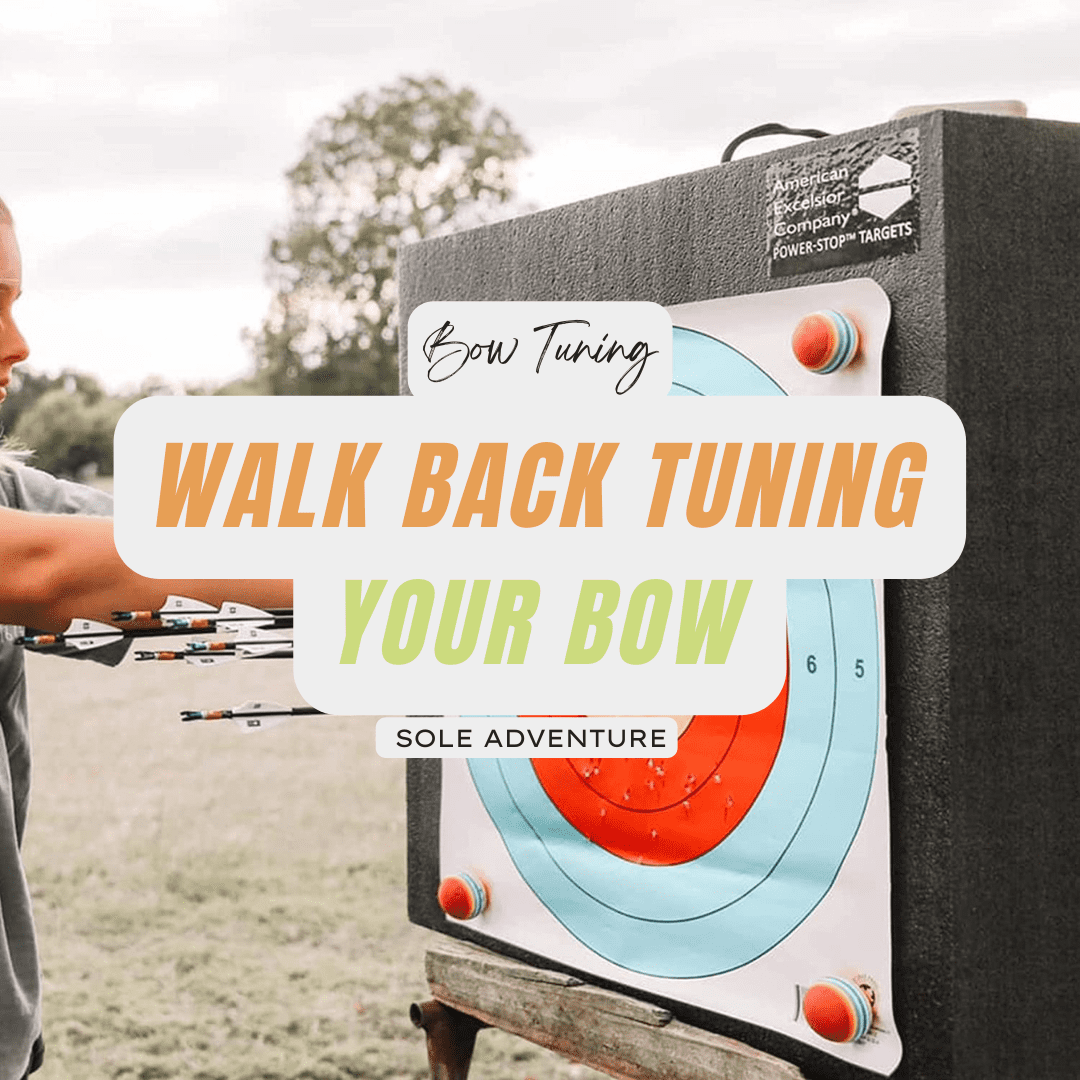
I have been tuning bows all my life, and the first thing I do when I get new accessories for my bow is going through the process of walk back tuning. While a pretty simple tuning process, it is vital for good arrow performance. You can save yourself a lot of frustration and time by walking your bow back before going to the next stage of arrow tuning – sighting it in. We will take a look at bow tuning in its entirety soon.
Contents
What is Walk back Tuning?
Walk-back tuning is a quick, easy and accurate way to set the center-shot on an arrow rest. Properly using this method will ensure that the rest is centered horizontally. We do this to get a consistent, clean flight for the arrow.
To determine your relative impact from various distances, always take accurate measurements. This will allow you to see how your arrows are impacting the target and make any adjustments necessary. Is the arrow still flying straight when you shoot it at 40 yards? Walk back tuning might help.
How to walk back tune your bow?
Get a large target
To begin, you will need a target with around three feet of vertical space, more is better.
Make a line with a rope
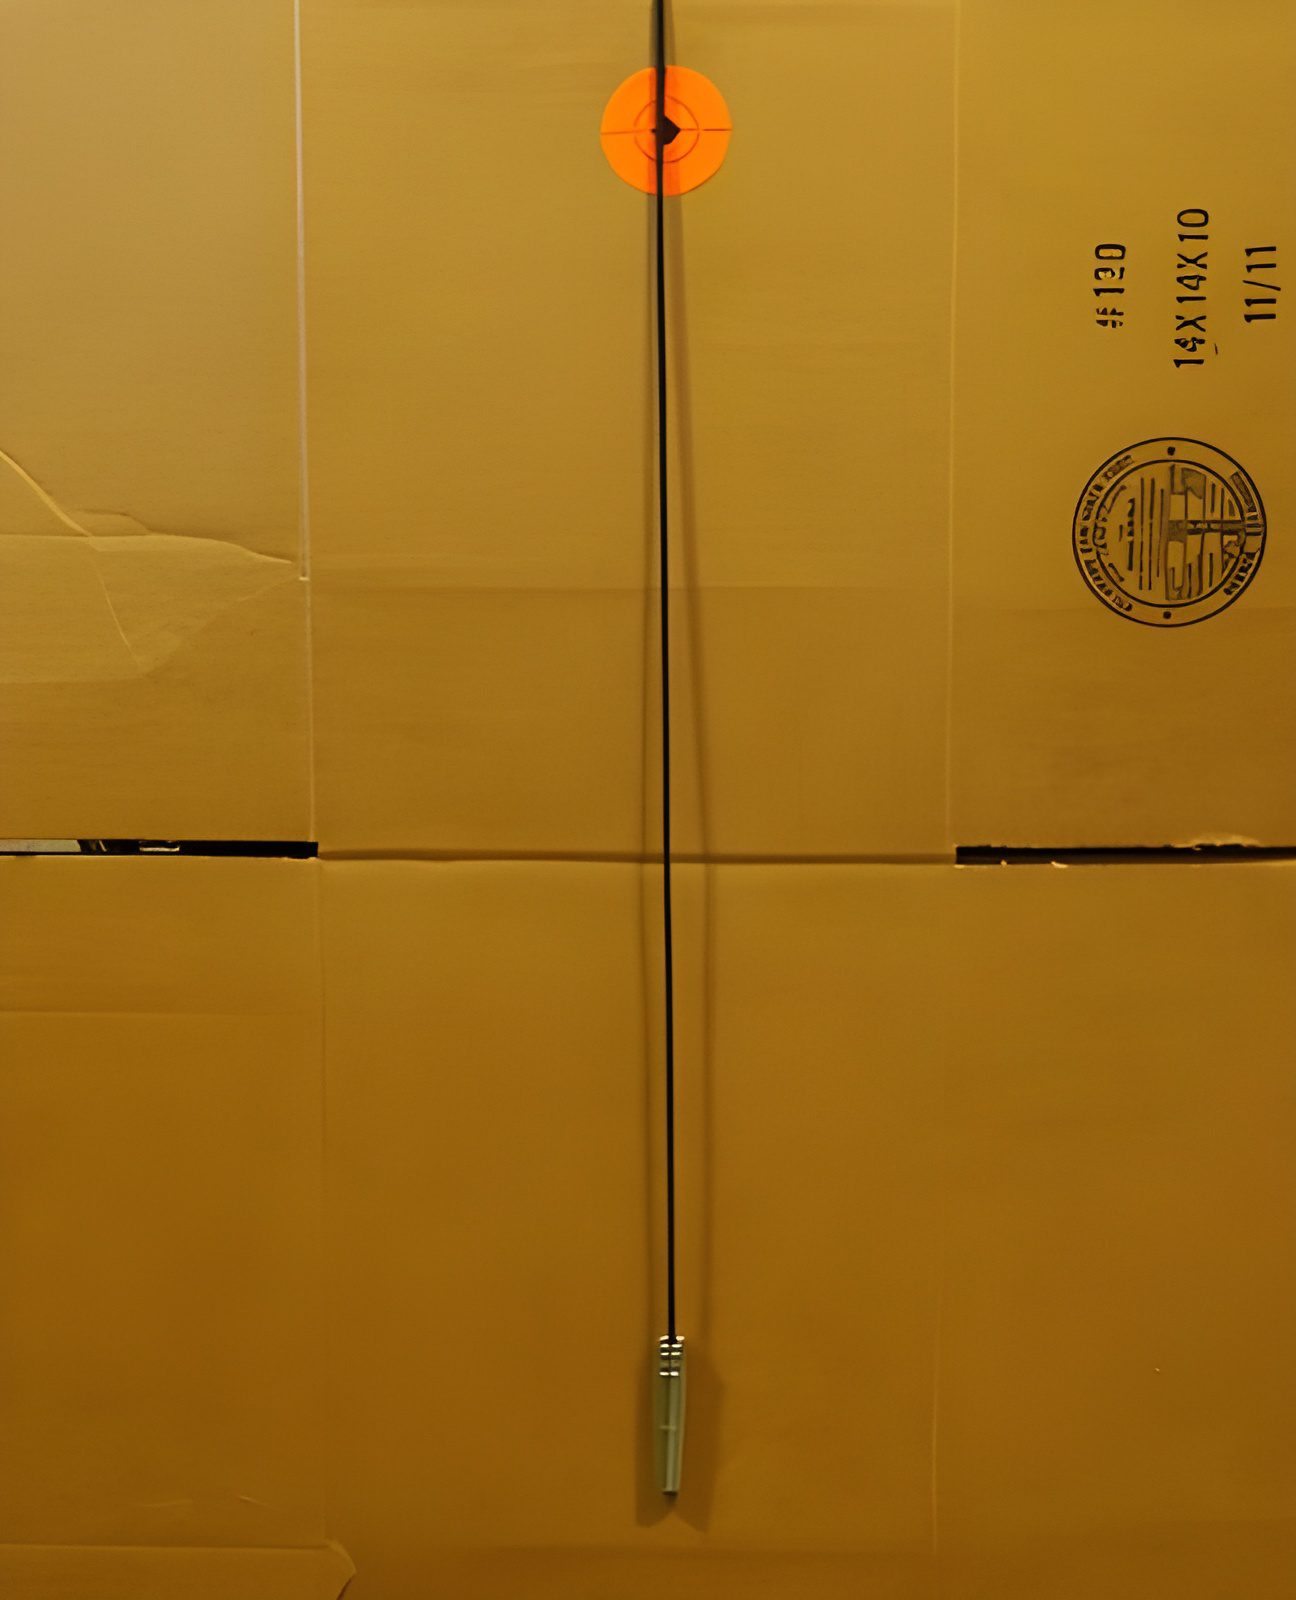
Next, take a string or small diameter rope and put a weight on the end of it. Attach the other end to the top of the target so that the string/rope is hanging down, perfectly vertical. In this picture I used a length of paracord and socket that weighs enough to pull the cord perfectly straight.
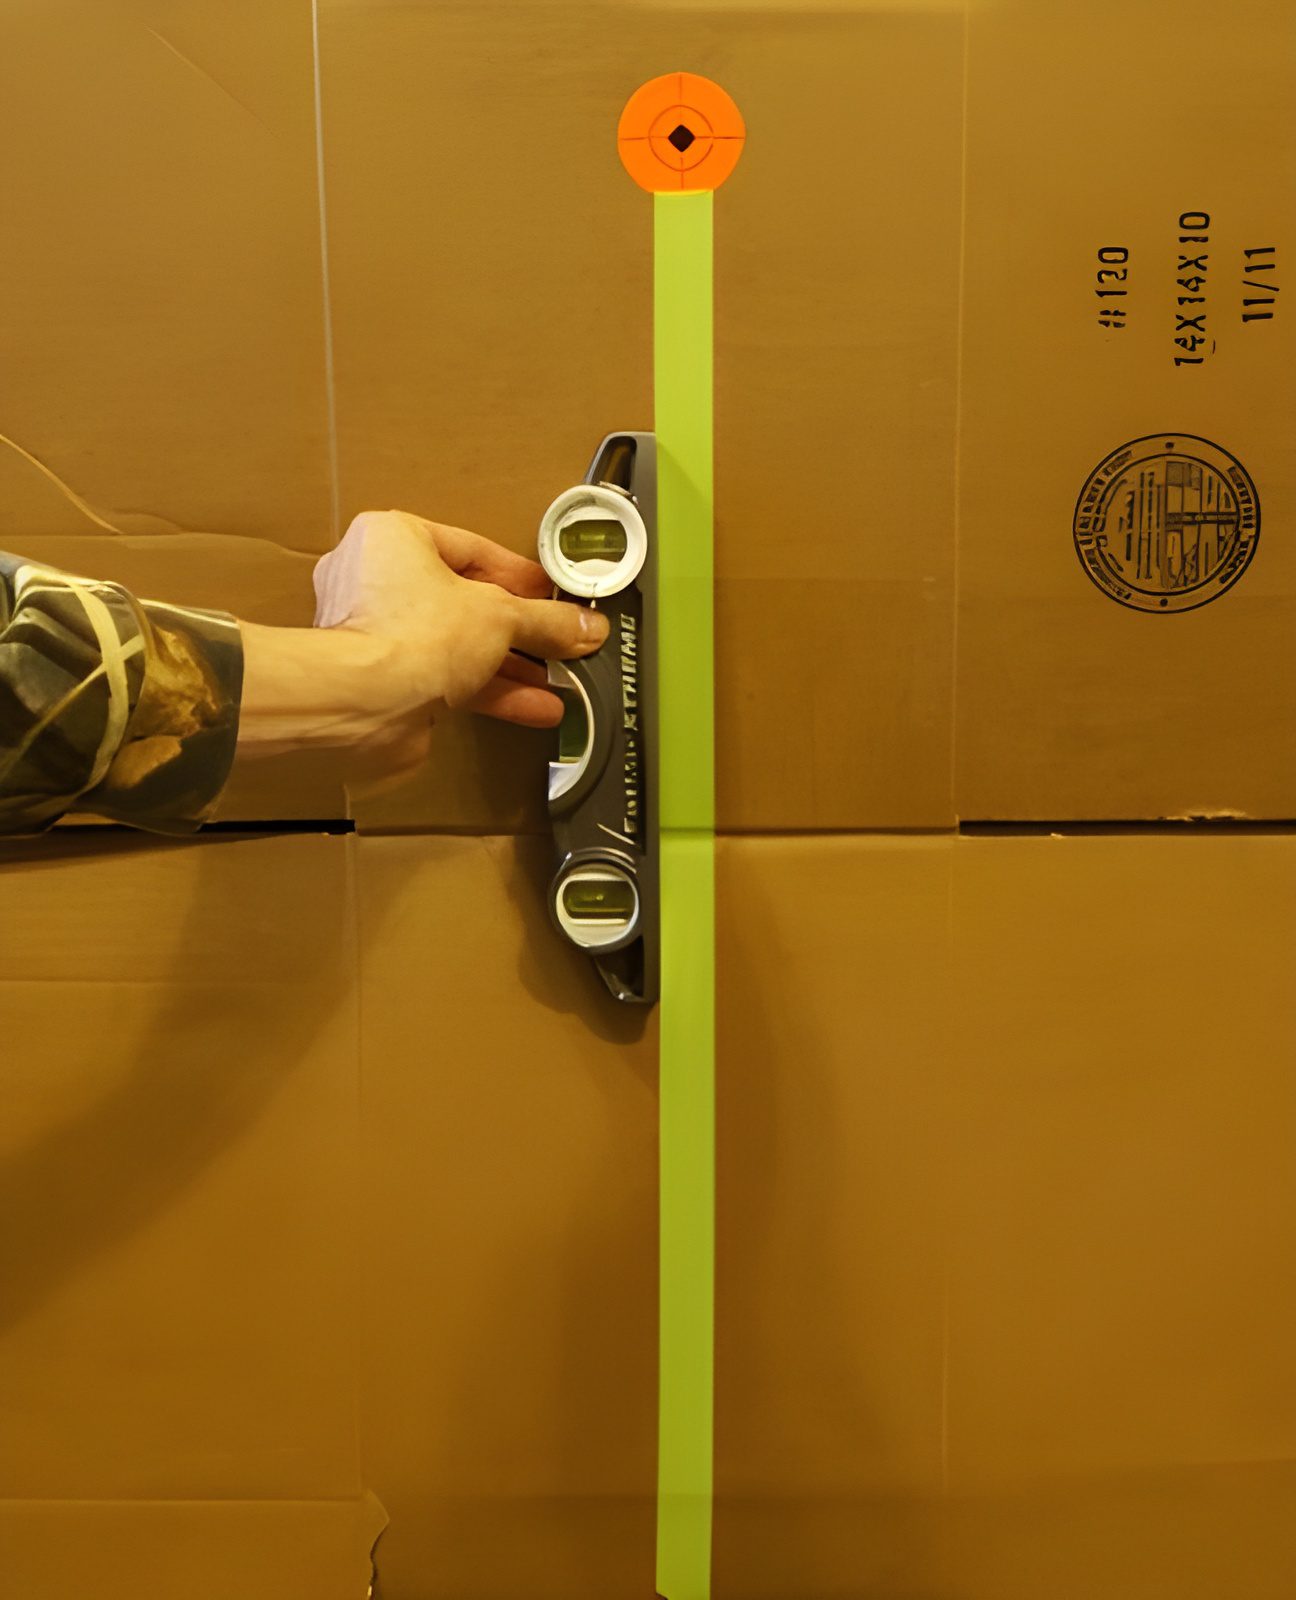
It is also possible to use a straight line of tape, paper/cardboard with a straight line drawn on it, etc. If doing so, use a level to make sure the line is vertically plumb! I cannot emphasize this enough, whatever string/line you use, it must be as perfectly vertical as possible.
Create an aiming point
At the top of the line, place something that you can use as a small target. I prefer to use orange aiming dot stickers, commonly found anywhere rifle targets are sold. It needs to be big enough that you can see and aim at it from up to 40-60 yards, and small enough that you can make sure you are dead center when aiming.
Start shooting at 20 yards or less.
Now go to a range you are comfortable shooting, somewhere you can group fairly well. This may be 10 yards for some people or 20 for others. But do not go beyond 20 yards. At this range, shoot at the aiming spot with your 20-yard pin; shoot a group of 3-5 arrows. If the arrows are not grouped well, try again until they are. It is easiest if they are hitting on the aiming spot at this point, so you can move your sight if you would like until you are hitting dead on, but it is unnecessary, as will be seen.
If you have enough arrows, you can leave them in the target and move to the next step. If not, retrieve your arrows but CLEARLY mark where they hit. This is very important to the process!
Move back 10 yards at a time.
Move back ten yards farther than where you just shot and repeat the process, using the same pin and shooting at the same spot. Do this until you have a satisfactory group. Continue this process of moving back 10 yards for each group until you have groups at least at 20, 30, and 40 yards, with farther being better. Because you will be using the same pin and aiming at the same spot, each group will be lower on the target as you move farther out.
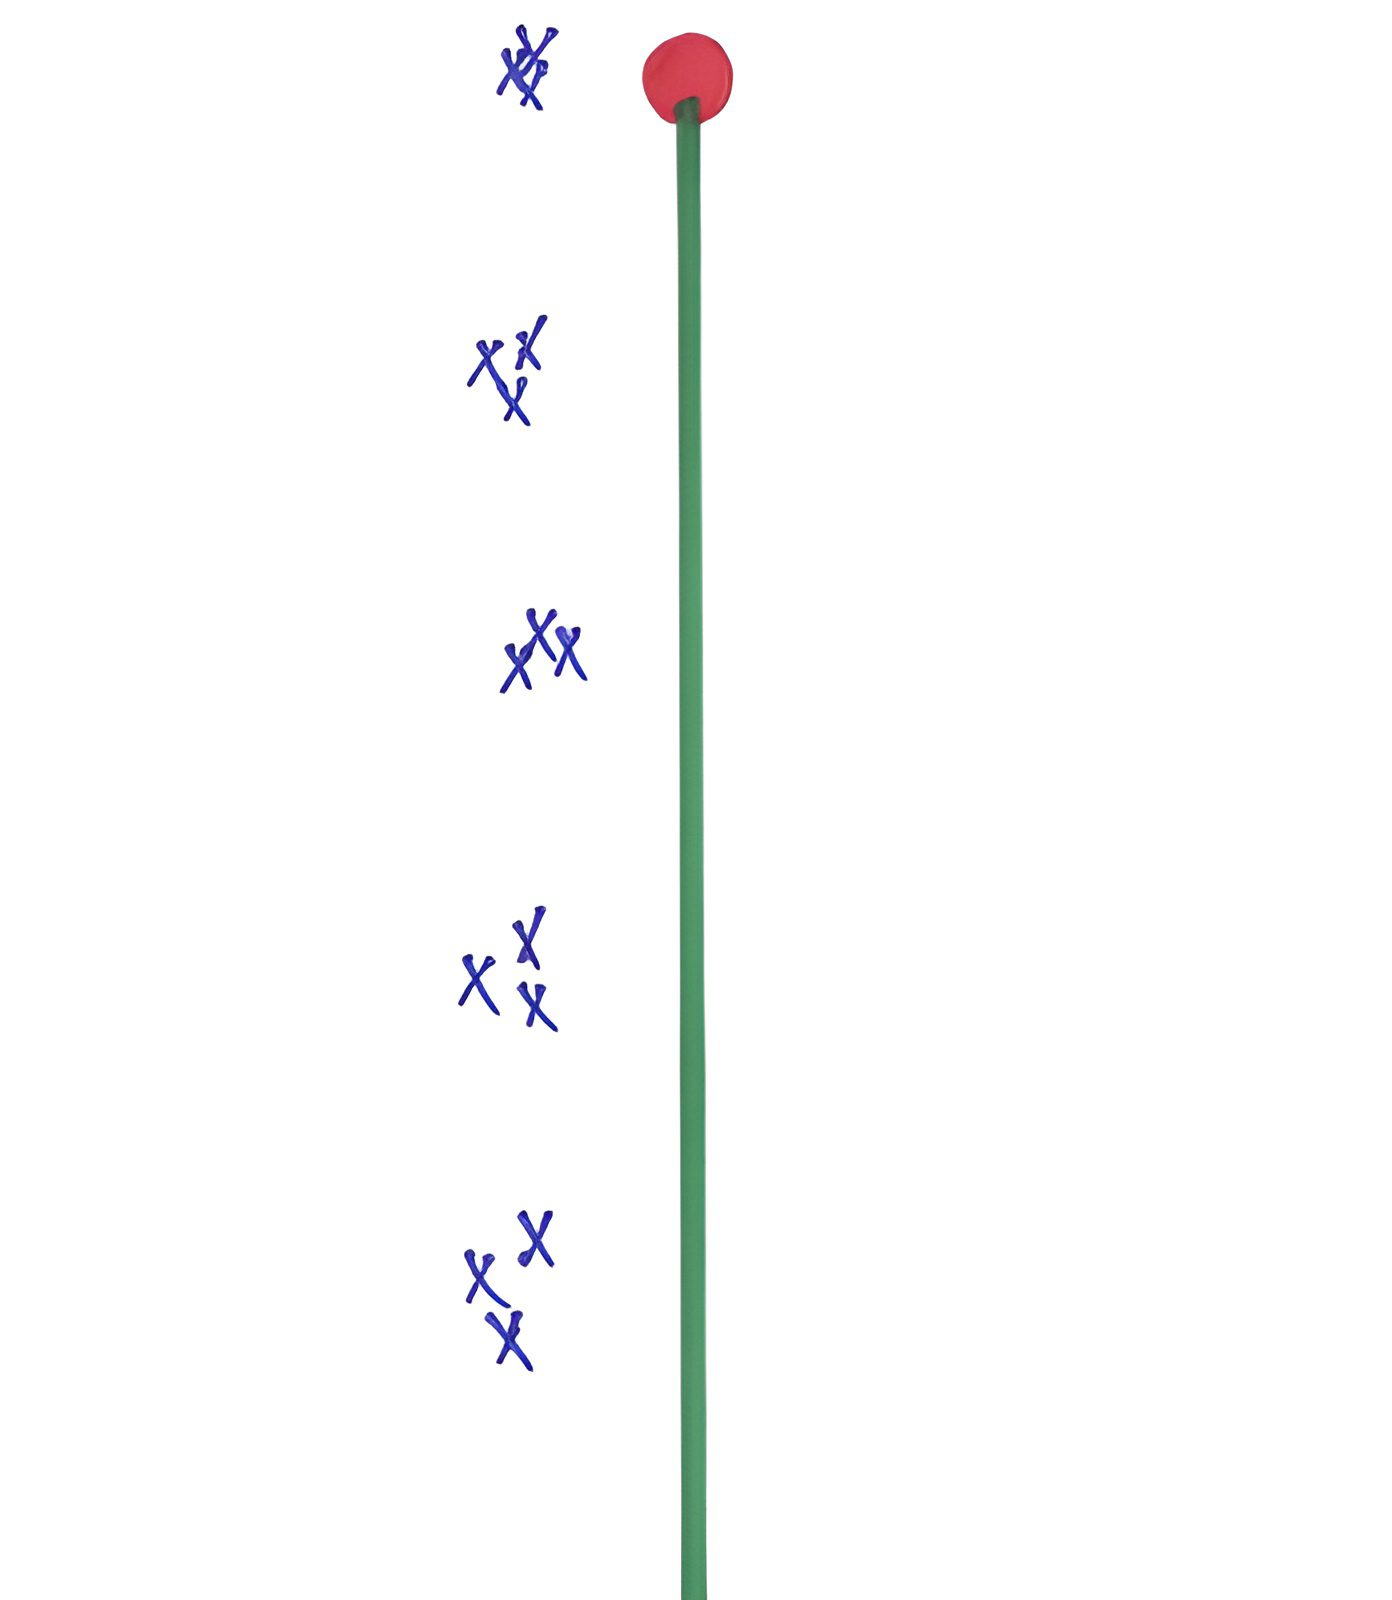
Adjust as needed
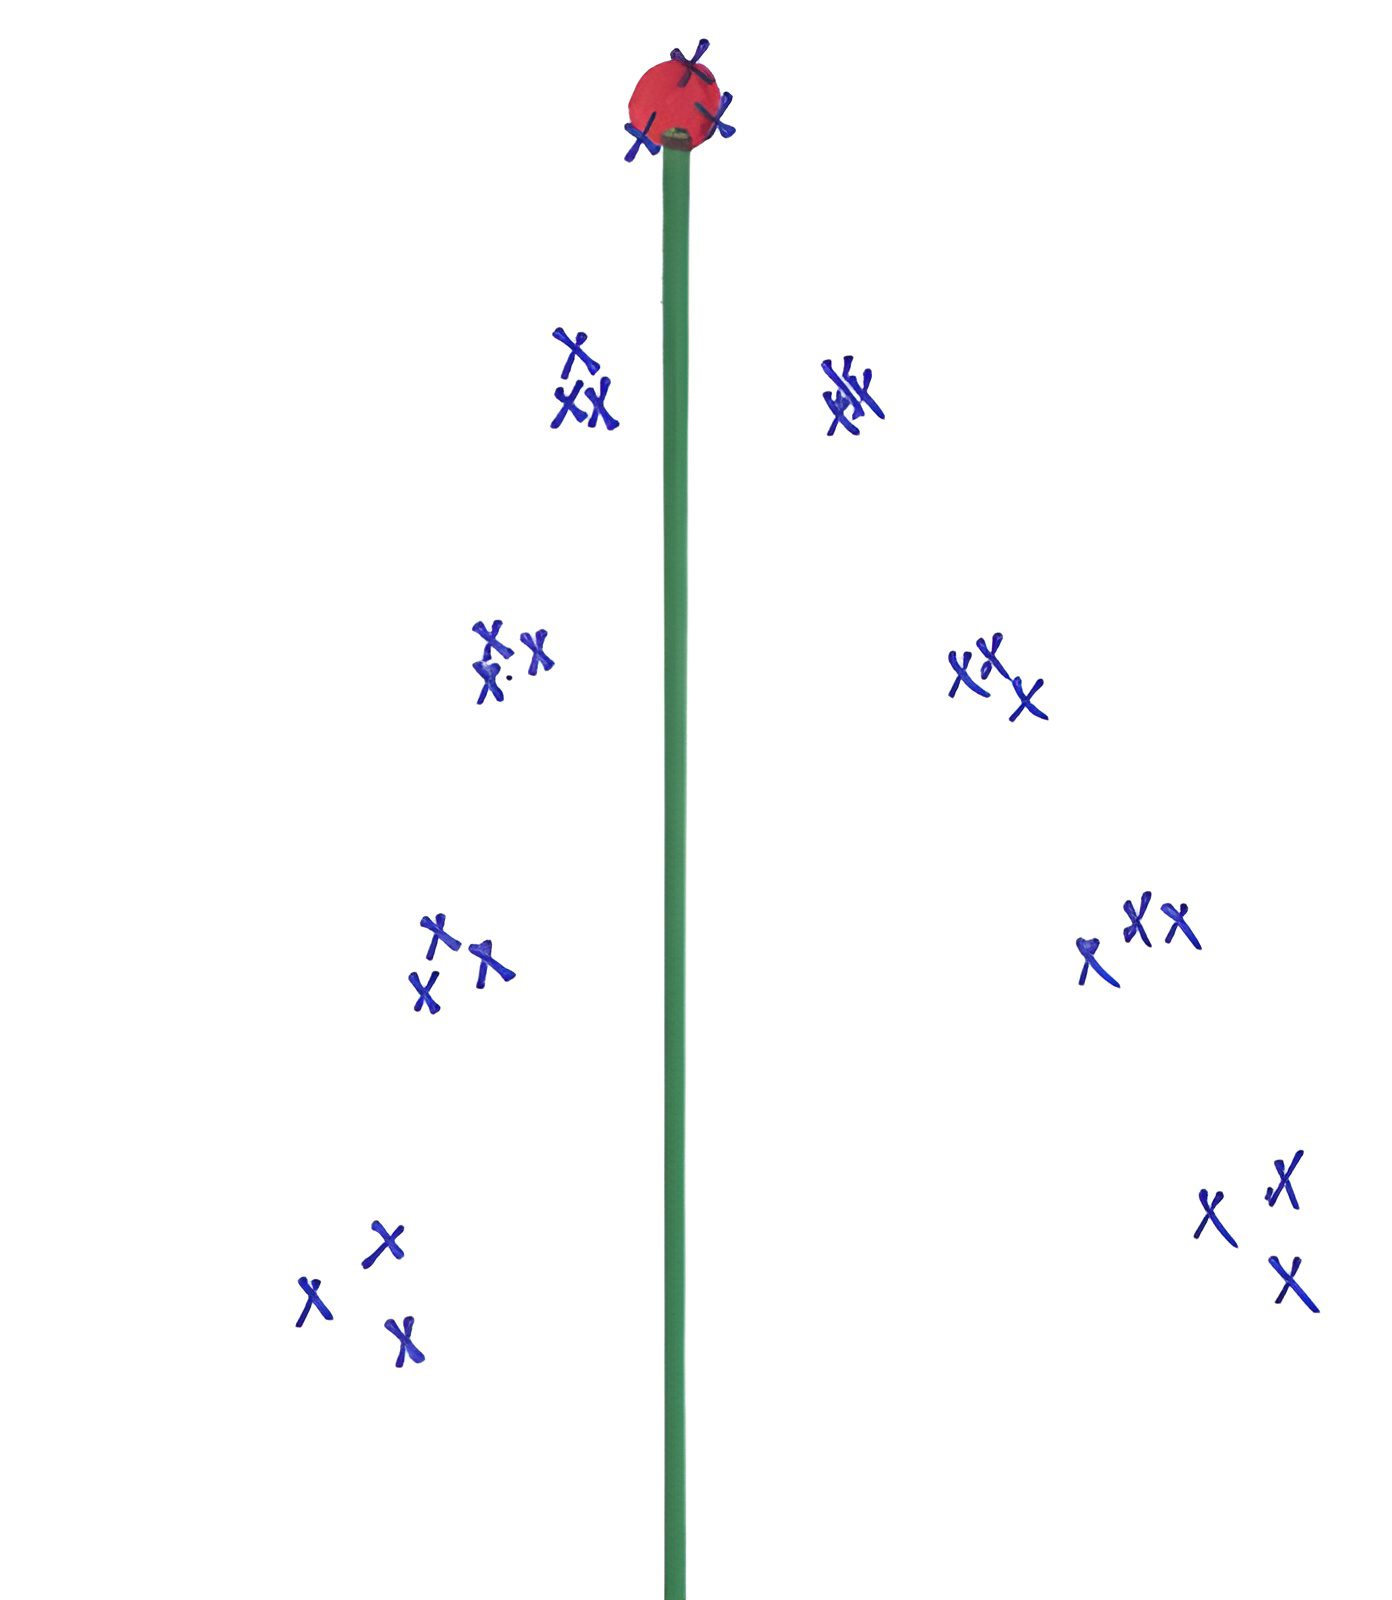
If your sight is on and your center-shot is perfect, all the arrow groups will perfectly align with the vertical line. If the center-shot is not perfect, the target will look like the above.
If the arrows are properly spined to the bow, there will be a consistent pattern to the groups.
The pattern that moves down and to the left indicates that the rest needs to be moved to the right and the pattern that moves down and to the right indicates the rest needs to move to the left. Move the rest a *very* small amount and repeat the process until all groups are lined up vertically. The sight pin does not need to be adjusted; the only concern is getting the patterns to line up vertically.Finish the process
When the rest is adjusted properly, the target should look like this.
All the groups are now aligned vertically, and the rest are in the correct position. In this case, the groups are to the left of the aiming dot because the rest had to be moved to the left. Now that the rest is adjusted properly, the sight pin can be moved to adjust the horizontal impact sight, and all of the pins can be adjusted for distance.
That was it! If you have any questions, let me know in the comments below.